Sunday, February 28, 2010

Sailing Away with a hodge-podge of scraps! :)

Hello there! I needed to make a card for a sketch & recipe challenge, so my fondness for keeping bits of goodness here and there came to my rescue! The challenge came from Crafts 4 Eternity - follow the sketch provided, use inking techniques and fabric on your card project.


Well the sketch required lots of strips behind the main image. I happened to have a few bits of fabric that I had saved from some handmade soap given to me by a friend. I don't sew, so fabric is not something I just usually have around the house. The burlap is some from a previous purchase a while back. Twine comes from my HUGE bags of dog food. The knot is made from a twine piece I saved from who knows where - I just loved the braided design! :D The cork pieces are leftover from a wine cork I sliced into buttons way back when for the blog hop.

I burned the edges of the Basic Grey Boxer paper to create a neat effect. did the same with the ends of the little braided knot. The chipboard oval is inked over with navy, and the circles with a silver sharpie to highlight.

You just never know how those little scraps might be put to use! Have a great and glorious day!
Jennifer Scull

Friday, February 26, 2010

Use Recycled Items: Texturize!

(Article originally published on the Sisterhood of Scrap Blog, March, 2009 for a "Teaching Tuesday" feature.)

Textured items can be found all over our homes and in nature. We can use recycled items to create texture, too! Many items can be used to create beautiful and unusual backgrounds and embellies for our scrapbooking and cardmaking creations. Let’s “scratch the surface” on the topic of TEXTURE!!

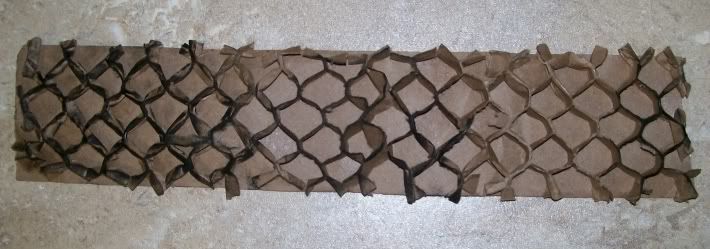
Packing cardboard from a set of dishes-
Photobucket

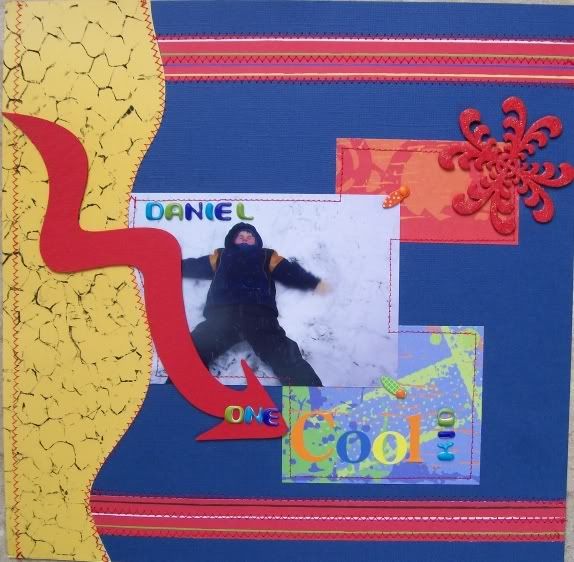
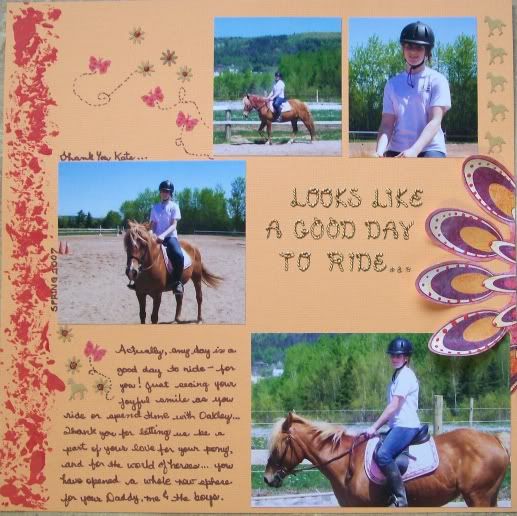
And here’s the result when it’s inked and applied to a LO!


Photobucket
(LO was created in 2008 with DT Kit from Scrapbooker's Club House.)


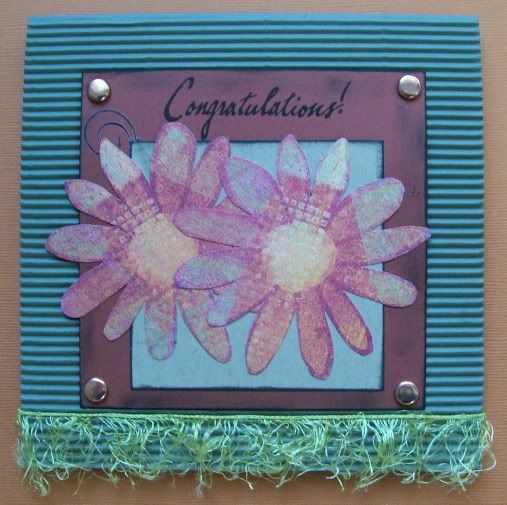
This green corrugated cardboard was also originally a packing material:


Photobucket
The “eyelash yarn” adds texture as well.

Here’s the result of using cheesecloth and paint on Bazzill CS to create a page background:


Photobucket


A peach pit, carefully washed and dried, was used to apply paint to a LO created this border. I “rolled” it along the cardstock with my fingers after covering it with LOTS of paint!!
Photobucket


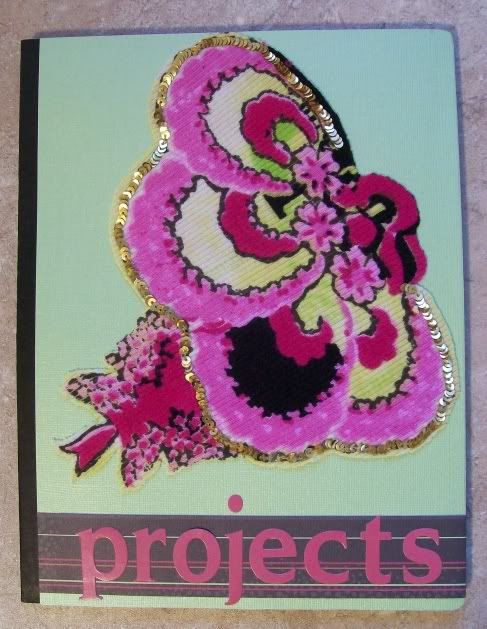
Fabric & embellies cut from clothing can be used to create gorgeous texture and visual interest! Look at this altered notebook!
Altered Notebook


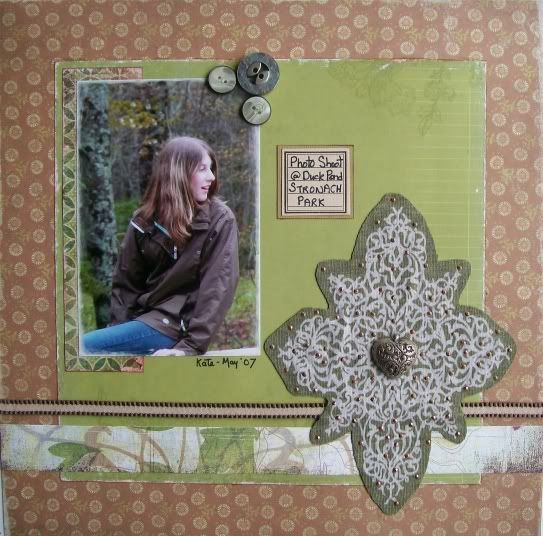
And, speaking of using clothing as embellies, here’s a photo of my daughter, Kate, embellished with a cut-out design from a t-shirt, with a heart shaped filigree button added!
Photobucket
(Photo Credit: Kristie Innes, Kingston, NS)


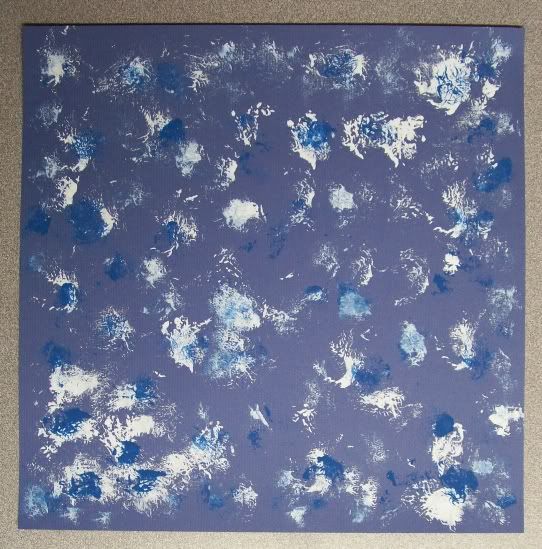
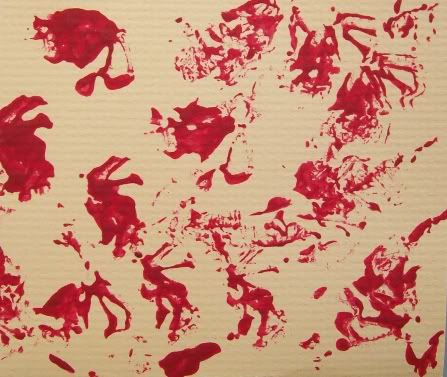
Here is what happens when you crumple up a wad of waxed paper and dip it in red acrylic paint! This makes a really pretty card background!!
Crump.Waxed paper acrylic


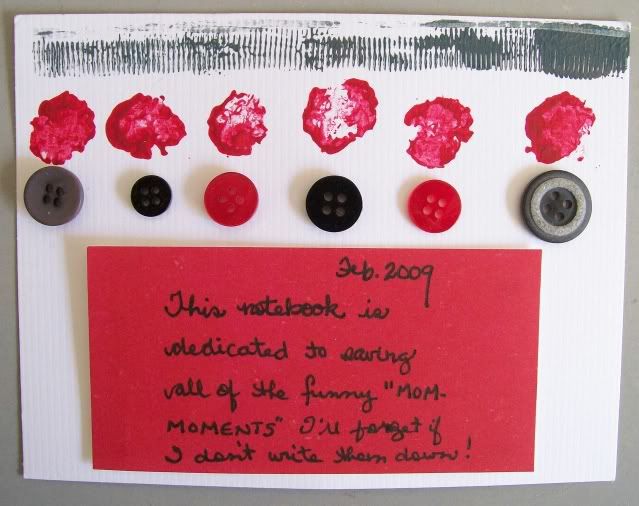
Buttons make great embellies. Try them in lines or on curves. Here’s a book dedication I made using an old cork dipped in red paint, and some red and black buttons set out all in a row on crisp white cardstock!
Cork, acrylicpaint, buttons


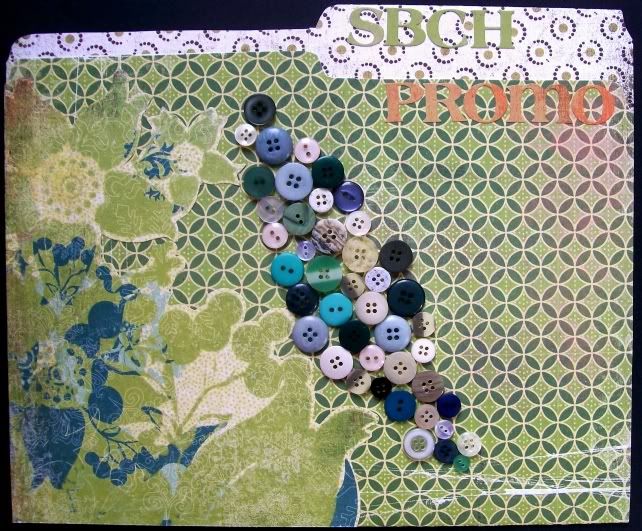
Button Clusters make great embellies and add a TONNE of texture! A button cluster applied to a sturdy file folder (which sits out on my desk) adds such beautiful texture that I just want to reach out and tough the surface of the folder every time I go by! LOL


File folder Button Texture


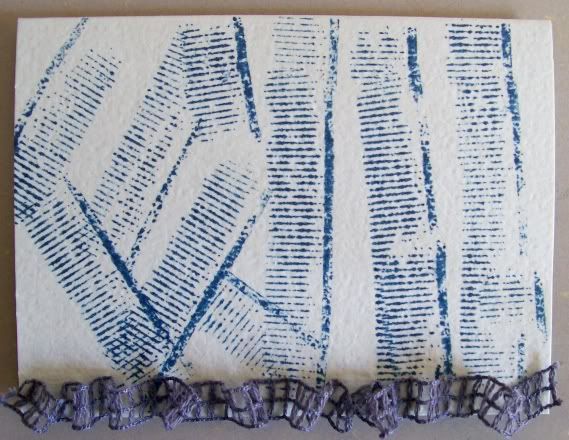
Sanding adds beautiful texture, too! I generally use 150 grit sandpaper on my cardstock as seen on this sanded card.
Photobucket


[This card was based upon a sketch created by Nicole Drewniak for World Cardmaking Day. 2008.]

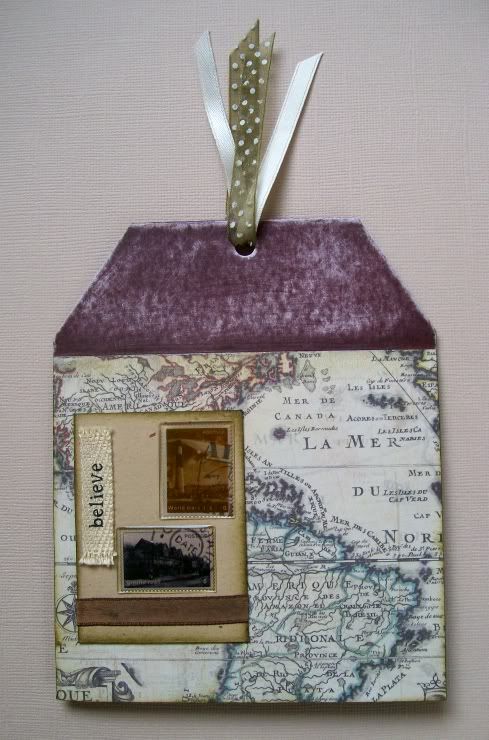
Here is what results when the edge of a plastic lid from a jar is inked and applied to cardstock:
Edge of plastic lid, Dye Ink, Trim


Additionally, some denim blue trim (All My Memories) was scrunched onto the tag as an embellie. this looks like it was tough to do but wasn’t, and added some easy texture to this masculine mini-card. I used MM Ribbon Glue to affix it.

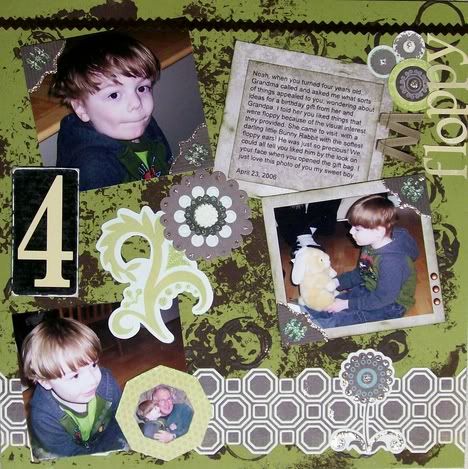
In this LO of Noah with his floppy bunny, the brown paint texture effect was created with crumpled tissue dipped in paint, then a paper towel tube dipped in the paint.
Photobucket
(January 2009 “Prudence” kit from SBCH was used for this LO.)


Here are some other ideas you can use to add a textured look to your projects. Why not try some or all of these with ink or acrylic paint?
Use an actual mini-paint roller, a plastic mesh onion bag, a “painting” toothbrush, a “smooshed” paintbrush, tip of a pencil eraser, the circular lids or tops of jars, one’s fingertips, leaves, fork tines, pinecones, small pieces of pine-bough, Popsicle sticks, or straws used to ’blow” paint across the cardstock or patterned paper.
These make fabulously different "textured looks." Have fun experimenting!

Why not share YOUR ideas about texture in scrapbooking? We’d love to see exampl
es!

Saturday, February 20, 2010

"Give a Hoot" Owl-Weekend Challenge!

Digi Kitty has a challenge out to use this FREEBIE on a card, layout, ATC or any type of altered project!!!

*This is a watermarked image.You will need to go to this place to download it.
If you're having trouble getting it, EMAIL me for help.

I thought it would be a cool challenge for Create It-GREEN members to participate in! Now, I was hoping to get this posted earlier but didn't get a chance.The challenge is over on Monday.But,even if you grab the freebie, and use it later, it's still OK!
If you do a card, go over there and let them know! Also, I'd LOVE to see it too, so EMAIL me your project and I'll post it here for everyone to see!!! There's no time limit on emailing your project to me!

Here's mine:

RECYCLE
closeup
*Click on the pics to see a larger view

If you'd like to see what other challenges I used this hanger for click on my blog link HERE.

Happy Recycling, everyone!!!

Wednesday, February 17, 2010

Treat Cups

Here is the project that I was going to post during the blog hop but couldn't do it because of family circumstances.

I started with cleaned fruit cups and filled them with treats.


I'll show you three different ways to turn these cups into treat cups.

With one of the cups I covered the top with mesh and clear gift wrap.


Then I wrapped it down around and tied a piece of ribbon around it.


The next treat cup I put in a zippy bag and closed it up.


I tied a piece of ribbon around the bag and trimmed off the top of the bag. To make it easy to pull together I poked a little hole in it to let the air out as I pulled the ribbon together.


The third I laid on a piece of tissue paper.


I pulled it up around the treat cup and tied a piece of ribbon around it.


So there you have it. Not too hard or fancy but adds a nice touch to a treat. I did these for Valentine's Day but ,of course, they can be used for any occasion, even as birthday treats. So, start saving those little fruit cups! They'll come in handy sometime!!!

Tuesday, February 16, 2010

Tissue Paper Tutorial

Do you ever find that after Christmas or a birthday you end up with loads of tissue paper? Thought so! Tissue paper can be fun to use on papercrafting projects, i like to layer it on background paper to add texture. i've even added it onto canvas for paintings. Today i wanted to show you how to make a flower embellishment from tissue paper. This is just to get you started off though, there are tons of possibilities!

First off you'll need several layers of tissue paper. Then you need to cut your flower. i used my sissix machine, but you could easily handcut some. Most die cut machines will cut through several layers.


Then you need to seperate each layer. You'll need to glue each layer together, but it's very fragile so be careful! i'd advise you use a dry glue. If you're finding this a bit too fiddly, you can always just put a brad through the middle to hold them all together.


Then all you need to do is glue a button or gem in the centre.


Here's the layout i made using my flower.


Be sure to post a link here if you make any flowers yourself!

Alexa

A Spectacular Second Day of Reveals

We had so many wonderful projects this month, that I saved two for our day two reveal! I wanted to show you some before and after photos and provide more complete instruction lists!

Ali provided this fun project to give as a gift.


Supplies and method:

1 soup can, size 284 ml (10 oz)
Spray adhesive like Elmer's Craft Bond (Newspaper to protect work area from any overspray)
Craft Foam measured and cut to size in a rectangle and adhered around can
Buttons in colours that coordinate- from secondhand store bin, to adhere around can on top of foam layer
Small Gluedots to adhere buttons to the can (OR: can use spray adhesive as I did); & to adhere small buttons as flower centres
Large Gluedots to adhere flowers (Prima Essentials 5: Space Boy Item # 527860) to top edges of can
To fill in the empty areas between buttons: Tim Holtz Distress Stickles (Walnut Stain) and Black Diamond Stickles
Craft Foam circle glued under can as a soft, desk-safe base (adhere with spray adhesive)
Black velvet ribbon adhered inside "lip" (top edge) of can to "pretty-it-up/finish it off..." - use large & small glue dots in combination to secure.

Allow ALL to dry thoroughly.

And then, just when I thought all of the fun ideas were taken, Jean knocked my socks off with this repurposed vase! Can you believe this started out as a purple clear vase! It is gorgeous and reminds me that cherry blossom time is just around the corner! Jean promised us instructions on her blog, so check it out!


Jean says, "I altered my vase using tissue paper from a gift package I received last Valentines day.
Using dimension paint for the hearts and applying the tissue paper over the top with Mod Podge.
Finishing off with a light spray of Glimmer Mist, Black Distress Stickles and another layer of Mod Podge.
The beads are from a string of Mar De Gras beads.
Cherry Blossoms are created from Scraps of Scrapbook Paper and tissue paper centers.
The Branches I created using Floral wire, tape and strips of newspaper.
Painted over with brown paint and sponged on black.
Also sealed over with Mod Podge.

Phenomenal projects ladies!

Monday, February 15, 2010

February Reveal at Create It-Green!

Hope you all had a wonderful Valentines Day! This month we have two new sketches and some wonderful creative ideas from our design team!
Our sketches come from design team member Victoria Warren-Mears.

First our card sketch:


This card features a repurposed circle from the inside of the Almond Roca Can, inked for background and Prima packaging.
Card by: Victoria Warren-Mears


Second our layout sketch:


Look at the cute repurposed pattern on this LO by design team member Alexa Gill.


Joan used flocked flowers and leaves cut from a Kleenex box for my flourish, a green paper bag for my photo mat and the circle tag is from a Bath and Body Works gift set. Isn't this gorgeous!


In this LO, Faye Perata used some great paint chips from her local hardware store that is closing for a neat accent.


Kandi used something right out of her garage! "If anyone has ever bought mesh tape for repairing walls, you know what an enourmous roll that is! I know there is no way my husband will EVER go through that whole thing (in our lifetime at least!) so I decided to repurpose it, and turn it into a crafty item! I layered the mesh tape onto cardstock and brayered over it, creating a fun and interesting pattern. It really helped my foam Thickers stand out, and I have plenty left over to use for a double layout!"


Tanya Smith used a stamped strip to help pop up her embellishments. I love the title on this one. These are some of the best times.


Out Altered Team Rocked the Challenge to do something with old jars, vases or cans!

I love Sammye's projects with vinyl, fabric and tulle scraps!


By Sammye Jo Singer


Vase by Jan Hennings.


Jan Hennings, was kind enough to share the recipes to fill these ultra cute jars!
Thanks Jan!


CHOCOLATE CHIP COOKIE MIX (Layer in quart jar)
1 tsp. baking powder
1 tsp. baking soda
1/2 tsp. salt
3/4 C. all-purpose flour
1 C. chocolate chips
1/2 C. brown sugar
1/4 C. sugar
1 C. flour

Cookies In A Jar (Print recipe and attach to jar)
Chocolate Chip Cookies
(Makes 3-4 dozen)
1 jar Chocolate Chip Cookie mix
3/4 C. butter or margarine, softened
2 eggs, slightly beaten
1/2 tsp. vanilla

Preheat oven to 375 F. In a large bowl, cream the butter, eggs and vanilla. Add the Chocolate Chip Cookie Mix and stir until the mixture is well blended. Drop by rounded teaspoonfuls onto greased cookie sheet. Bake 8-10 minutes.

Oatmeal, Raisin & Spice Cookie Mix (Layer in quart jar)
1/2 C raisins
1/2 C. sugar
1 tsp. ground cinnamon
1/2 tsp ground nutmeg
1/2 C. brown sugar
2 C. all-purpose flour
1 tsp. baking soda
1/2 tsp. salt
1 C. old-fashioned oats
Layer the ingredients in the order given in a wide mouth 1-quart canning jar. Pack each layer in place before adding the next ingredient.
Attah a gift tag with the mixing and baking directions.

COOKIES IN A JAR RECIPE (Print recipe and attach to jar)
1 jar Oatmeal, Raisin & Spice Cookie mix
1/2 C. butter or margarine, softened
2 eggs, slightly beaten
1 tsp. vanilla
Preheat the oven to 375 F. In a large bowl, cream the butter, eggs and vanilla. Add the oatmeal mixture and stir until well blended. Drop by rounded teaspoonfuls onto greased cookie sheet. Bake for 10-12 minutes.


Double Fudge Brownie Mix (Layer in quart jar)
1 1/2 C. sugar
3/4 C. cocoa powder
3/4 C. all-purpose flour)
3/4 C. chocolate chips
1/2 C. chopped pecans or walnuts (optional)
Layer the ingredients in the order given into a wide-mouth quart canning jar. Pack each layer in place before adding the next ingredient.
Attach a gift tag with mixing and baking directions.

Double Fudge Brownies ( Print recipe and attach to jar)

1 jar Double Fudge Brownie Mix
3/4 C. butter or margarine, softened
3 eggs, slightly beaten

Preheat the oven to 325 F. In a large bowl, cream the butter and eggs. Add the Double Fudge Brownie Mix and stir until well blended. Spread batter into a slightly greased or sprayed 9 X 12" pan. Bake for 30-40 minutes. Cool in pan.


Potato Soup (Layer in a quart jar)
2 C. Instant mashed potatoes
1/12 C. instant powdered milk
2 T. instant chicken bouillion
2 tsp. dried minced onion
1 tsp. dried parsley
1/4 tsp. pepper
1 1/2 tsp. seasoning salt

Potato Soup (Print recipe and attach to jar)
1 jar Potato Soup Mix
Place the Potato Soup Mix in a large soup pot. Add 8 cups boling water. Mix well and let stand 5 minutes to thicken. Serve immediately.

We hope you'll try out these ideas and sketches! Let us know if you do!

Look for two more awesome projects this week by Ali and Jean!

Friday, February 12, 2010

Goody Bag Flowers

If you have kids then you probably have empty goody bags headed for your trash. Before you throw them out, give them new life as a decoration.  Simply take the bag and cut off the bottom, fold it in half and secure the folded part with tape (or chenille or what ever is on hand) add a stem, put into a vase and enjoy!! My daughter and I made these in less than three minutes!! Here is one flower:


And here is the bouquet on Penelope's shelf:


Happy Valentine's Day!
-Tanya

Friday, February 5, 2010

WELCOME TO THE HOP!!!

Hello everyone!
Welcome to the
Create It Green, Re-purpose with Love, Valentine Blog Hop!
If you are just joining us---You are in the right place... this is the beginning and the end point for the hop!! As you go through the hop, remember to comment on the blogs you visit and gather all the "key words" from each post! You should  keep the words in the order that you collect them and when you get back here, at the end of the hop, just email the "phrase" you come up with for a chance to win a prize. So, get your Right Click Finger ready for saving all the project ideas, tutorials, Digi's and find those words!!! If you are just now ending, please comment on this post, then Send the Valentine Quote to this e-mail address: crosscourtcutie@gmail.com . Be sure to include your name and any comments about the hop in the email!

Create It Green is a relatively new, but we have grown so much in a short time. Our 1st Blog Hop featured 7 stops on the hop. Today, we have 12 blogs you can visit!!! Here is your Hop line-up!
1-Jan- recycled containers
2-Kandi- scrapbook page with Valentine theme in pinks and reds! She has prizes:- 2 Valentine themed, small clear stamp sets, (one by Studio G and one by Inkadinkado), and 3 bottles of Glitter Glue by Studio G in Valentine colors!
3-Cyndi, that's me! I have a recycled Envelope project and some Free Digi's!
4-Jean  is showing off a Recycled Baby formula container, made into a floral container! The flowers & foliage are origami using Scrapbook Paper Scraps with a Bonus video tutorial for Valentine Pocket heart and a Big Bite Crop-a-Dial Giveaway!!!
5-Ali is explaining 2 Large "Recycle" flowers made with a mystery item. Her prize is a handmade mini-album all about doodling.
6-Tanya created a Layout for you using recycled cardboard letters as the title and a Card using a coffee sleeve and scrap grungeboard. Her prize is stamps & recycled journaling cards.
7-Donna is showing a re-purposed cards called "Headline News"- made from scraps of scrapbook paper, newspaper, fabric.Her sneak peak is featured below!
8-Sarah loves ATC's and features them with 100% recycled using scraps of paper, calendars, greeting cards, etc.
9-Joan has a "Love" scrapbook page layout made with packaging.
10-Robin - named her project "Love Bouquet" and shows you how to use a recycled fruit can.
11-Jennifer's demonstration is on 2 different cards that have recycled elements.
12- Alexa-has a tutorial on how to make flowers from your paper scraps & a layout to go with them.
Lastly you will be traveling back here to submit your collected words!We are proud of this special line-up that leaves you plenty of time to use these new ideas to make your own treats for your sweeties!

 Some Blog Hop members have giveaways going on - don't miss out! Be sure to leave comments and become a "Follower" each blog! That will help your chances of winning.
We also have a Yahoo Button on the right... if you haven't joined the "Group"...please do! There is an Art Lottery that needs your help! In the future, we will also be having Swaps, Challenges, and Green Product Reviews. Please sign up and be part of a Crafty, Friendly, Green Community!
NOW- On With The HOP!!!!

But before you go, the first Key Word is... (Be sure and write these down!!) It Is the word..."LOVE"
Your next stop is a visit with JAN! Just click her name and it will take you there!

Have fun and I'll see you back here
after you make the rounds!
Your Hop Hostess, Cyndi

PS...Here are your first Free Digi's! Enjoy!